黑群晖进阶教程
使用frp实现公网访问
Linux服务端部署frp
下载Linux版本frp_0.52.3_linux_arm64.tar.gz
同时将这个压缩包传到云服务器,并解压
frps和frps.ini是腾讯云主机(用作 Server)
frpc和frpc.ini是家庭linux机使用(用作Client)
frp服务器防火墙配置
frp服务器防火墙添加端口
1
| firewall-cmd --zone=public --add-port=5000/tcp --permanent
|
frp服务器防火墙删除端口
1
| sudo firewall-cmd --zone=public --remove-port=5000/tcp --permanent
|
重新加载防火墙
显示防火墙开放端口
1
| firewall-cmd --zone=public --list-ports
|
修改服务端配置frps.ini
1
2
3
4
5
6
7
8
9
10
11
| [common]
bind_port = 7000
// 这四行配置密码
vhost_http_port = 7080
token = password
dashboard_port = 7500
dashboard_user = user
dashboard_pwd = password
subdomain_host = syy4996.top
|
修改客户端配置frpc.ini
1
2
3
4
5
6
7
8
9
10
11
12
13
14
15
| [common]
server_addr = 47.99.x.x
server_port = 7000
[web]
type = http
local_port = 9001
custom_domains = 47.99.x.x
[subdomain]
type = tcp
local_port = 9001
subdomain = subdomain
|
启动frp
正常启动
./frps -c ./frps.ini
配置系统启动
vim /lib/systemd/system/frps.service
在文件里写入以下内容
1
2
3
4
5
6
7
8
9
10
11
12
13
| [Unit]
Description=frp server
After=network.target
[Service]
Type=simple
ExecStart=/frp/frps -c /frp/frps.ini
ExecReload=/bin/kill -s HUP $MAINPID
ExecStop=/bin/kill -s QUIT $MAINPID
[Install]
WantedBy=multi-user.target
|
frp采用命令查看状态和启动
1
2
3
4
| sudo systemctl start frps
sudo systemctl restart frps
sudo systemctl status frps
sudo systemctl stop frps
|
部署hexo框架以及配置butterfly主题
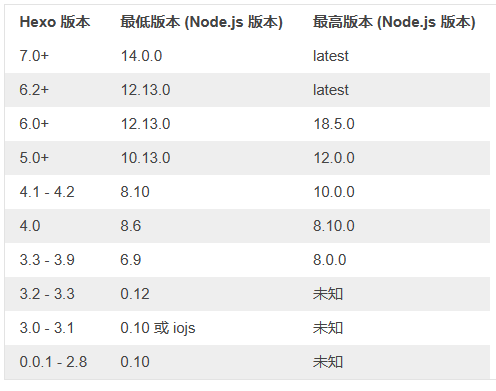
套件中心安装node.js 12(群晖6.17仅支持12且只能用cnmp6.0)
1
2
3
4
5
6
7
8
9
10
11
12
| : 查看node版本
node -v
: 查看npm版本
npm -v
: 查看npm配置信息
npm config list
: 查看当前源
npm config get registry
: 永久修改安装源为淘宝
npm config set registry https://registry.npm.taobao.org
: 永久修改安装源为官方镜像
: npm config set registry http://www.npmjs.org
|
安装cnmp
1
2
| npm install -g cnpm@6 --registry=https://registry.npm.taobao.org
cnpm -v
|
安装hexo
在当前目录安装最新版的hexo-cli

安装hexo-cli
1
2
3
4
| : 在全局插件目录里安装4.2.0版的hexo-cli
npm install -g hexo-cli@4.2.0 --registry=https://registry.npm.taobao.org
: 在当前目录安装最新版的hexo-cli
npm install hexo-cli
|
先修改package.json 改hexo版本为6.2然后运行
1
2
3
4
5
6
| vim package.json
hexo -v
mkdir blog
cd blog
hexo init
cnpm install
|
安装pug 以及 stylus 的渲染器(使用cnmp安装)
1
| cnpm install hexo-renderer-pug hexo-renderer-stylus --save
|
1
| git clone -b master https://gitee.com/immyw/hexo-theme-butterfly.git themes/butterfly
|
生成静态网页目录,并启动
1
2
3
4
5
| hexo generate
hexo server
nohup hexo s > /dev/null 2>&1 &
ps aux | grep hexo
kill -9 25613
|

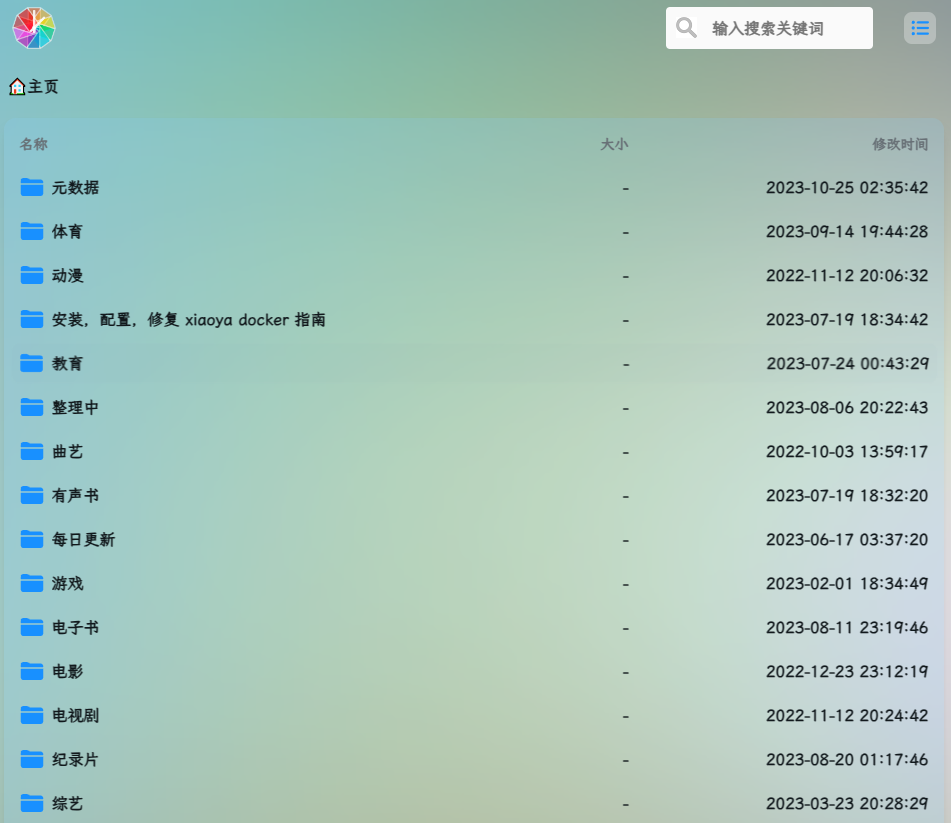
视频地址
1
| bash -c "$(curl http://docker.xiaoya.pro/emby_plus.sh)" -s /volume1/docker/xiaoya-media /volume1/docker/xiaoya
|
版权声明: 此文章版权归syy所有,如有转载,请註明来自原作者


